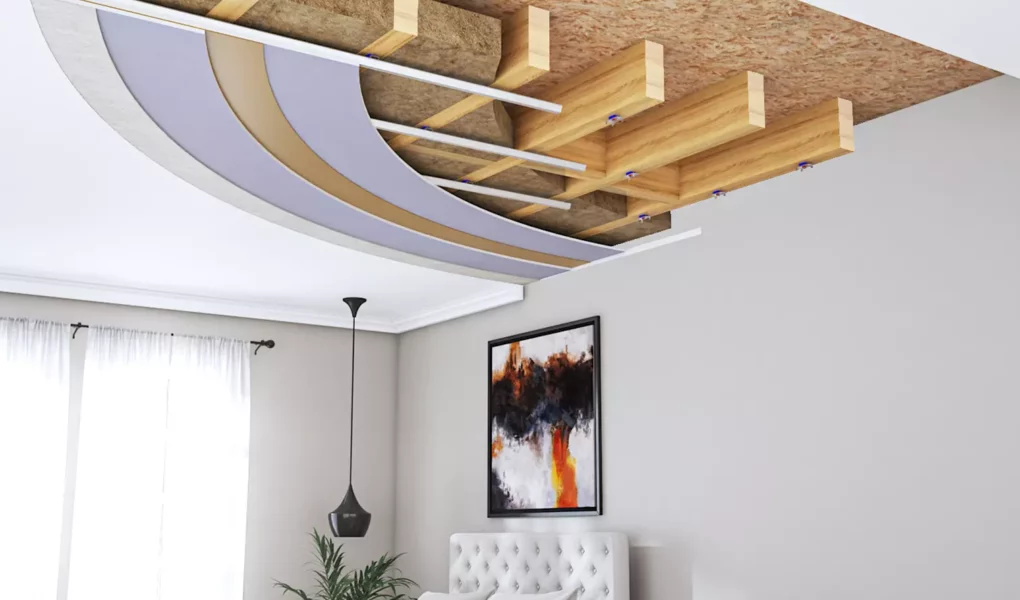
Are the cacophonous sounds of bustling streets or the upstairs neighbours hosting impromptu dance parties interfering with your peace and quiet? Soundproofing an apartment can make a world of difference, creating a sanctuary of silence within the urban hustle and bustle.
This step-by-step instructional post will guide you through the process of identifying, selecting, and installing the right soundproofing materials to ensure a peaceful, noise-free dwelling.
Step 1: Identify the Source of Noise
Before embarking on your soundproofing journey, it’s crucial to discern where the noise is emanating from. Is it the street traffic, the elevator, or perhaps the neighbourhood nightly band rehearsals? Identifying the source of the noise will help you target the right areas for soundproofing, saving you time and resources.
Step 2: Choose the Right Soundproofing Materials
Once the source of the noise is pinpointed, it’s time to choose the appropriate soundproofing materials. Various options might include:
- Soundproofing Foam Panels: A sound absorbing panel is excellent for dampening high-frequency noises like echoing or voices.
- Acoustic Curtains: These thick, heavy curtains help absorb sound and can be a quick fix for noisy windows or doors.
- Door Seals: Install these to close the gap between the floor and the door, which is often a significant source of sound penetration.
- Soundproofing Compound: Ideal for ceiling or floor soundproofing as they add mass to the structure, reducing sound transmission.
When selecting materials, consider their sound transmission class (STC) or noise reduction coefficient (NRC) ratings. The higher these ratings, the more effective the material will be at soundproofing.
Step 3: Install Soundproofing Materials
Walls
- Prepare the Surface: Make sure the wall is clean, dry, and free of any loose debris.
- Apply Adhesive: If using sound absorbing panel, apply a strong adhesive to the back of the panels. If using a soundproofing compound, follow the manufacturer’s instructions for mixing and applying to the wall.
- Install the Panels: Press the foam panels firmly against the wall, holding for a few seconds to ensure a secure bond. For the compound, spread it evenly over the surface with a trowel.
- Overlap and Stagger: If using multiple panels, ensure they overlap for maximum soundproofing, and stagger the seams to avoid any direct paths for sounds to travel through.
Floors
- Assess the Floor: Check the state of your apartment’s floor. Carpet or rugs can provide some noise insulation, while hard surfaces may require heavier treatment.
- Underlayment: Install a soundproofing underlayment designed for floors. They often come in rolls and are easy to lay out.
- Apply Adhesive (If Necessary): If using floor panels or compound, follow the same steps as for walls.
- Cover With Flooring: Once the soundproofing material is laid out, cover it with your preferred flooring—carpets, tiles, or laminate.
Ceilings
- Mirror Wall Installation: For the ceiling, you’ll often use the same materials as for the walls. This time, however, install them on the ceiling instead.
- Hire a Professional: Ceilings can be trickier due to their height, and often, professional installation is worth the expense.
Step 4: Enhance Soundproofing with Curtains and Door Seals
Curtains
- Simply hang heavy-duty, acoustic curtains over windows to dampen street noise and reduce sound transmission.
Door Seals
- Preparation: Clean the area between the door and the floor to ensure a good seal.
- Apply Adhesive Backing: Most door seals have adhesive backing. Simply peel off the paper and press it into place.
- Silicone Caulk (optional): For extra protection, apply silicone caulk around the edge of the seal to fill any gaps.
Step 5: Regular Maintenance and Checks
Effective soundproofing requires regular inspections. Over time, sealants may degrade, or you might find that a new noisemaker has moved in next door. Periodically, re-assess the noise levels in your apartment and reapply or replace any needed soundproofing materials or seals.
Common Mistakes and Misconceptions
- Difference Between Soundproofing and Sound Absorption: Sound absorption lowers the volume of sound inside an area by absorbing surplus noise, whereas soundproofing stops sound from entering or leaving. Make sure you’re addressing the right issue.
- Misidentifying Sources of Noise: The dishwasher might not actually be as noisy as you think—ensure your focus is on the true sound culprits.
- Using the Wrong Materials: Each soundproofing material has its uses. Don’t implement a solution for echoes when you’re dealing with heavy traffic noise.
Safety Precautions
- Protective Gear: Wear gloves and a mask when handling any adhesive or caulking materials.
- Fire Safety: Be aware of your apartment building’s fire safety regulations when adding new materials. Soundproofing should not impede fire escapes or the function of smoke alarms.
- Professional Assistance: If you’re unsure about the installation or need advice on products, don’t hesitate to consult with professionals.
Conclusion
Don’t let outside noises ruin your home anymore – take control with these simple steps. With these tips, you can now successfully soundproof your apartment and create a peaceful living space. Be thorough in your approach, addressing the root causes of the noise and maintaining your soundproofing over time. Remember to check and maintain your soundproofing materials regularly for optimal results. Happy soundproofing!


